.svg)
If you keep up with tech news, then I’m sure you’ve already seen the dozen or so headlines about a developer by the name of Danny Lin (@kdrag0n on Twitter) booting Windows 11 on a Pixel 6. The Pixel 6 isn’t the first Android phone to boot Windows 11, but it is the first phone to do so without its underlying firmware needing to be modified. This is possible because the Pixel 6’s official Android 13 release ships with KVM support as well as Android’s new Virtualization module, so kdrag0n was able to use what’s officially available on the phone to boot a Linux distro in a container and then run Windows 11 on ARM through QEMU.
Esper Device Management
As I explained a few weeks ago, Google plans for Android 13 to include the first release of the KVM hypervisor and virtual machine framework. The goal is to de-privilege and isolate third-party code by having it execute in a virtual machine at the same privilege level as the OS and kernel rather than at a higher level.

Google has chosen to deploy KVM as the common hypervisor solution (well, technically, they’re deploying pKVM, which is KVM with additional security features) and crosvm as the virtual machine manager. KVM is enabled through the kernel, while crosvm is shipped as part of the new Virtualization Mainline module. Google has been using the Pixel 6 to test pKVM and the Virtualization module, but prior to the Android 13 release, neither was enabled in production builds.
Now that they’re here, though, developers and power users are going to have lots of fun with them. Kdrag0n is a talented Android system and kernel developer with a spare Pixel 6 and a boundless tinkering spirit, so he’s had a bit of a head start. Since I just got a spare Pixel 6 Pro today (thanks, David!), I thought I’d join in on the fun and take another look at what Google shipped in the Android 13 release.
Thus, in this week’s edition of Android Dessert Bites, I’ll be sharing some of what I learned so you can go wild with Android’s new virtualization tools. Before I dive in, though, I highly recommend reading my previous post on virtualization, as it explains more of the how and the why behind this change in Android 13.
Before you get started
In case I haven’t made it clear already, this will only work on the Pixel 6 or Pixel 6 Pro at the moment. The Pixel 6 and Pixel 6 Pro are currently the only two phones to ship with the Virtualization module in Android 13, and they’re currently also the only two phones that ship with KVM support out of the box. As explained by kdrag0n, the Android 13 bootloader and firmware for the Tensor platform can expose the EL2 privilege level, which is the privilege level needed to run hypervisors. However, because the crosvm binary can only be executed with root access, you’ll need to unlock the bootloader of your device and gain root access (I recommend installing Magisk). Once you’ve verified your device is rooted, you’re ready to move on.
Step 1: Enable pKVM
Although the Pixel 6’s Android 13 kernel has KVM support, it’s disabled by the bootloader, at least in the first Developer Preview release. To enable it, you’ll need to run the following fastboot command:
fastboot oem pkvm enable
Step 2: Prepare your files
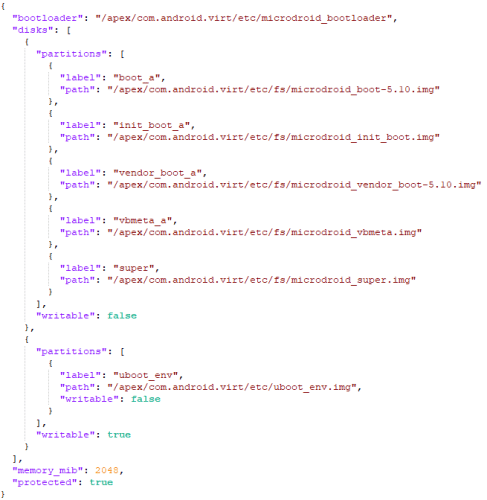
Next, you’ll need to prepare a Linux distro and kernel image. The distro you choose needs to have AArch64 support, otherwise, it won’t boot. As for the kernel, I tried using the kernel included in the microdroid boot image (after unpacking it), but I didn’t have any luck getting a Linux distro to boot on it. It likely failed to boot because it was missing disk drivers that are included as loadable modules in the microdroid vendor_boot image. Kdrag0n compiled Linux kernel 5.17.0-rc3 with the default configuration and has been toying with various distros on top of that, so follow his lead if you’re looking for success.
To keep things simple, I chose Alpine Linux. I just wanted to get to the Linux shell from my Pixel 6, so I chose to do the bare minimum. After downloading the minimal root filesystem package (for AArch64 of course), I proceeded to create a rootfs image:
mkdir /tmp/alpine-linux-rootfs
tar xf /tmp/alpine-minirootfs-3.15.0-aarch64.tar.gz -C /tmp/alpine-linux-rootfs
mksquashfs /tmp/alpine-linux-rootfs /tmp/alpine-rootfs.img
After sourcing both images, push them to your device to a directory like /data/local/tmp. Now you’re ready to boot Linux!
Step 3: It's time to boot
APEX modules are mounted at the /apex/<apex_name>@<version> directory. Since crosvm is shipped as part of the Virtualization module, it’s located at /apex/com.android.virt/bin. In an elevated shell, you can execute crosvm commands, including the ‘run’ command.
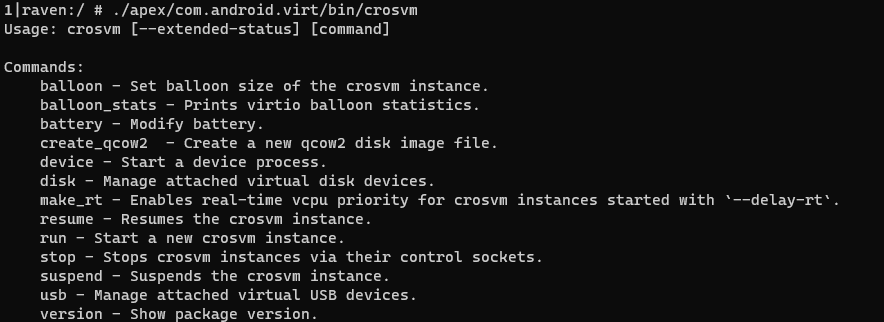
The ‘run’ command supports a ton of arguments, so be sure to append ‘--help’ to see what you can do.
Crosvm’s documentation suggests you can run a very basic VM with a command as simple as:
crosvm run -r "${ROOT_IMAGE}" "${KERNEL_PATH}"
but I needed to append a few additional arguments to get my Alpine Linux image to boot. Here’s the full command I ran:
./apex/com.android.virt/bin/crosvm run --disable-sandbox -p 'init=/bin/sh' --rwroot /data/local/tmp/rootfs.img /data/local/tmp/kernel.img
If everything goes right, then you should see a bunch of text for the kernel boot sequence and end up at a Linux shell. There are a few commands you can run to verify you’ve booted the distro of your choice, but the one I ran is:
cat /etc/os-release
What else can you do?
Obviously, what I’ve done just scratches the surface of what’s possible here. Kdrag0n has already shown off booting, logging in, and using Windows 11 in a VM. While GPU acceleration isn’t supported, it can run simple games like Doom. Otherwise, performance is “near-native” when running various Linux distros, and “really usable” when running Windows 11 in a VM. Unfortunately, because nested virtualization isn’t supported, you won’t see any Android on Windows on Android shenanigans (ie. no WSA).
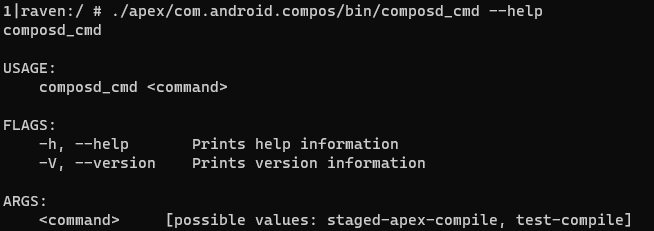
You can also test the intended use case for the Virtualization module: isolated compilation. The com.android.compos module contains the Compilation OS-related binaries, and one of them lets you trigger a test compilation (though it’s unclear if it actually compiles your installed apps). Lastly, you can boot and run payloads in microdroid (provided you actually provide a workload).

Thanks for reading this week’s edition of Android Dessert Bites, and special thanks to kdrag0n for his extensive help with everything! I’ve only had my new Pixel 6 Pro for a few hours at the time of this writing, but I hope to tinker more with virtualization to see what use I can get out of it. If you manage to get a Linux distro booting in a VM on your Pixel 6 using this guide, then please let me know on Twitter.
Esper Device Management
FAQ


