.svg)
Adding AOSP (AKA non-GMS) devices to your fleet is a little bit different than adding those that use GMS (Google Mobile Services). Since AOSP devices are lacking some of the APIs required for various provisioning methods (like 6-tap QR, Zero Touch, and Android for Work), you need to make sure these devices can communicate with your management platform. Here’s how (you can even follow along by using Esper yourself – try it free right now).
Manage AOSP Devices
Wait, what is AOSP?
AOSP stands for Android Open Source Project — it’s the source code that powers Android. An AOSP-based OS is a barebones Android build that doesn’t have many of the things found in GMS devices (like Google Maps, Firebase notifications, Google Play Services, etc.), as those are proprietary Google technologies and not open source. Since AOSP is the open source code for Android, however, it opens the door for customization so you can build whatever sort of device you want or need with AOSP.
That’s the simple explanation, anyway. If you’re looking for a longer, much more in-depth look at AOSP, what it is, and what you can do with it, we’ve got you covered.
Why is enrolling AOSP devices different from GMS devices?
There are a variety of ways you can enroll devices on Esper, but some of the most common methods rely on proprietary tools not found in AOSP. With AOSP, you won’t be able to use methods like the 6-tap QR code, Android for Work, or Google’s Zero Touch Enrollment to get your devices on the Esper platform.
While this presents a small challenge, it’s nothing that we haven’t done thousands of times before. In fact, we have a simple way for you to make sure your devices are Esper-ready.
How to provision AOSP devices with the Esper Device Provisioner Tool
To make enrollment easier for AOSP devices, we have the Esper Device Provisioner. This makes onboarding much easier by avoiding complicated tools like the Android Debug Bridge (though this is still an option if you’d like to set things up manually!). It also allows you to include cached versions of the APKs you’ll need on your provisioned devices so you don’t have to download the same APK multiple times.
The Device Provisioner can enroll up to 16 devices at one time over USB, and it’s available for Windows, Mac, and Linux. For the latter, we also offer an Appimage version of the tool that can be run without dependencies. You’ll need to make the file as executable (chmod +x), but otherwise it’s ready to go. Here’s what a typical workflow would look like with the Esper Device Provisioner.
First, log in to your Esper endpoint from within the application.

Follow the instructions on the first page to enable adb on your device. When adb is enabled, connect your device over USB and click next to continue.

Select your template of choice. You can also use the search bar to quickly narrow down your options. Click next to continue. \

Verify apps that are to be installed in this next page. The other options can be left alone in most cases.

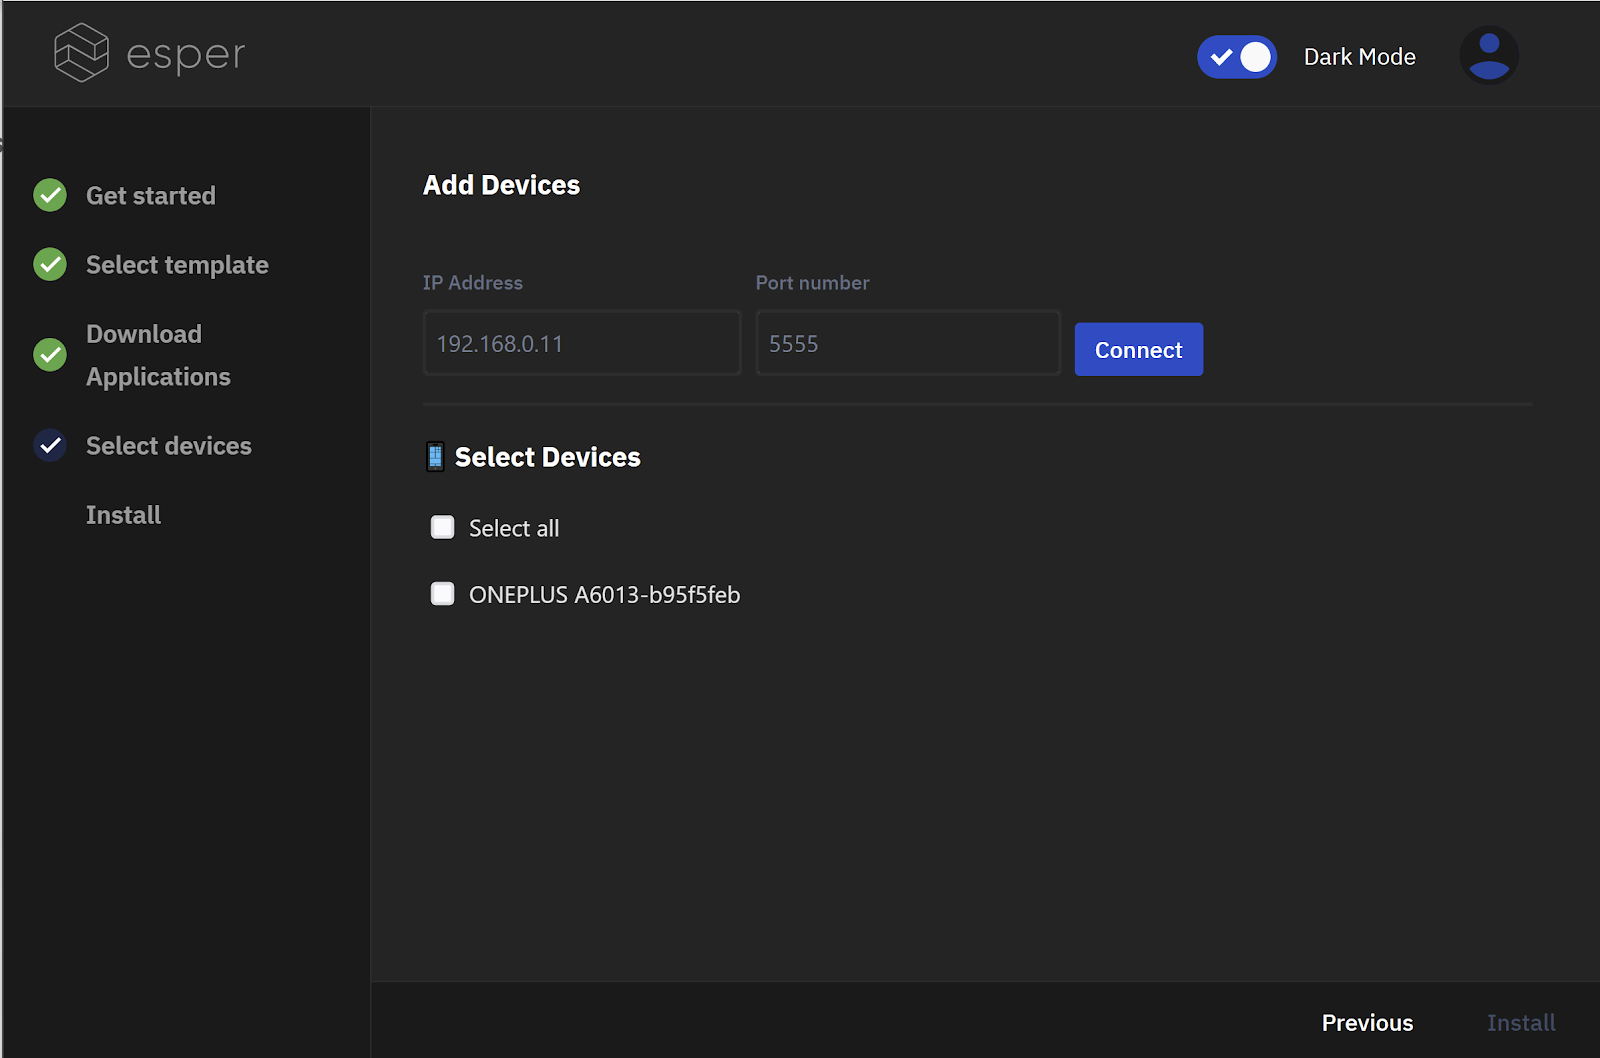
Select the devices you want to provision from the next screen. You can also select wireless devices by entering their local IP addresses in the appropriate field. The port number is usually 5555.
The tool should now begin provisioning your device automatically. Once it is done, you will be greeted by the Esper agent running on your device with the last few permissions that need to be given so that the agent can fully manage your device. It’s that simple!

How to manually provision AOSP devices on Esper
To manually onboard devices, you’ll need to use the Android Debug Bridge (ADB). If you’re not familiar with ADB, we have a full primer on what it is and how to get started.
With ADB set up and ready to go, you’ll need a couple of things to do this:
- The Esper Agent and Helper APKs
- A local downloaded copy of your template (you can get this by heading to your template, clicking the ellipsis (...) and selecting “Download Config”
Once you have these files in the same directory, run the following commands in order to provision the device. This assumes your Agent APK is named agent.apk and the Helper APK is named helper.apk.
adb shell mkdir -p /sdcard/Android/data/io.shoonya.shoonyadpc/files/
adb push config.json /sdcard/Android/data/io.shoonya.shoonyadpc/files/config.json
adb shell settings put global install_non_market_apps 1
adb shell settings put global package_verifier_enable 0
adb install -r -t helper.apk
adb install -r -t dpc.apk
adb shell dpm set-device-owner io.shoonya.shoonyadpc/com.shoonyaos.shoonyadpc.receivers.AdminReceiver
adb shell monkey -p io.shoonya.shoonyadpc -c android.intent.category.LAUNCHER 1
Your device should now show the Esper launcher, and you will be able to finish the provisioning process on the device, by granting a few final permissions.
What if I need to provision more than 16 devices at a time?
If you have an entire fleet of devices to provision at once (or more than 16, anyway), we have the ability to integrate our agent and associated files within your AOSP build. This way the device will automatically provision on flash and boot without any additional enrollment steps. All we need for this is access to the AOSP source tree for your particular device. This is called Seamless Provisioning.
Ready to get started?
The Esper Device Provisioner is a simple and easy to use tool that can help you deploy your dedicated AOSP devices with no technical prowess required. The process is beaten in simplicity only by Seamless Provisioning. If you run into any issues while working with the Device Provisioner, check out our Help Center or feel free to contact us — we would be happy to look into your particular device and use-case.
Easy Provisioning with Esper
FAQ


