.svg)
In this post, we will learn about the MQTT (Message Queuing Telemetry Transport) by creating a simple Android app that will leverage the Paho Android Service. It's an MQTT client library written in Java and supports MQTT versions 3.1.1 and 3.1, specifically designed for developing Android applications.
Android Developer Tools with Esper
What is the MQTT protocol?
MQTT is a lightweight publish/subscribe messaging transport protocol that connects remote devices (the standard is maintained by the OASIS Open group).
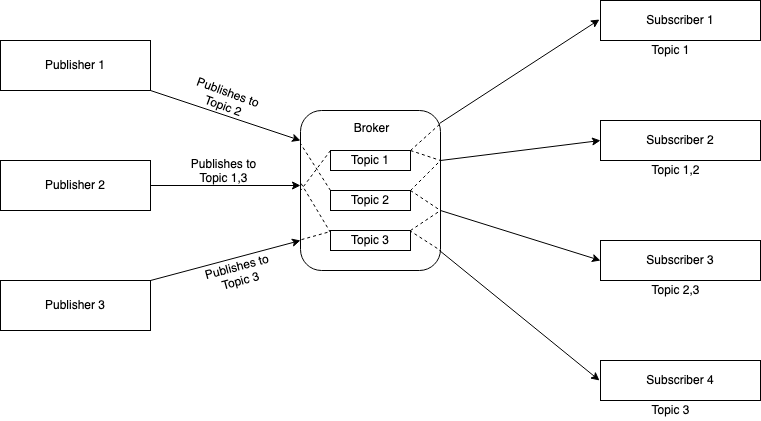
In this model, we have a broker between publisher and subscriber (the names given to clients to differentiate between the client publishing the message and the client subscribed), and every communication happens via the broker. Clients subscribe to a topic or subject, and the client receives every message published to that topic by the publisher. A point to be noted is that every publisher or subscriber is classified as an MQTT "client," as both rely on the broker to send and receive data.
A publisher-subscriber pattern (also known as Pub/Sub pattern) decouples senders from the receivers. The publisher (message sender) classifies messages into specific categories called topics, and the subscriber (message recipient) can select specific topics to receive the messages. Here, publishers do not know about the subscribers and vice versa or which (if any) topics they subscribe to. (For a more detailed breakdown of these terms, Google Cloud has a good resource.)
The diagram below gives you a sense of how publishers, subscribers, and the broker interact in a typical publisher-subscriber messaging system (MQTT is one of many).
How is the connection established between client and broker?
MQTT protocol is based on TCP/IP, where both the client and broker must have a TCP/IP stack. MQTT connections always involve a client and a broker — but no two clients connect directly. To start a connection, the client sends a CONNECT message to the broker, and the broker responds with a CONNACK message and a status code to determine whether the connection was successful.
Functionalities of the MQTT broker include:
- Filtering the incoming messages and forward them to the subscribed clients
- If a connection is persistent, the broker must hold the session data, including subscription status and missed messages.
- Authentication and authorization of clients.
Exploring Quality of Service
The guarantee with which a message is sent or received by the broker is expressed in terms of Quality of Service (QoS). There are three QoS levels defined in MQTT:
- QoS 0: At most once, i.e., "fire and forget." The message is sent to the client or broker, but there is no delivery guarantee.
- QoS 1: At least once, meaning the message needs to be delivered at least one time to the receiver. The message may be sent or delivered multiple times. The sender stores the message until the sender receives a PUBACK packet from the broker (matched to the message packet ID) indicating that the receiver received the message.
- QoS 2: Exactly once, i.e., the message will be delivered only once to the receiver. This takes the most time as a four-way handshake ensures that the broker delivers the message only once. It is the highest level of service in MQTT.
It's worth keeping in mind that when we talk about QoS in MQTT, we have to consider QoS between the publishing client, the broker, and the subscriber. As you can see in the example below, QoS downgrades in MQTT can occur when sender and receiver QoS are mismatched.

Using the above diagram as an example, suppose Client 1 publishes a message to the broker with QoS 2, and the subscriber (Client 2) subscribes to the broker with QoS 1. In this case, the broker delivers the message to Client 2 with QoS value 1. Although the broker can deliver the message more than once to client 2, QoS 1 guarantees delivery of the message at least once and does not prevent multiple deliveries of the same message. The same would be true if QoS values were reversed between subscriber and publisher.
MQTT demo app
Now that we've established some basic MQTT principles, let's dive into building an application. We'll explain important code blocks as we go along and use the Adafruit IO MQTT broker to visualize the data that we are sending from our device.
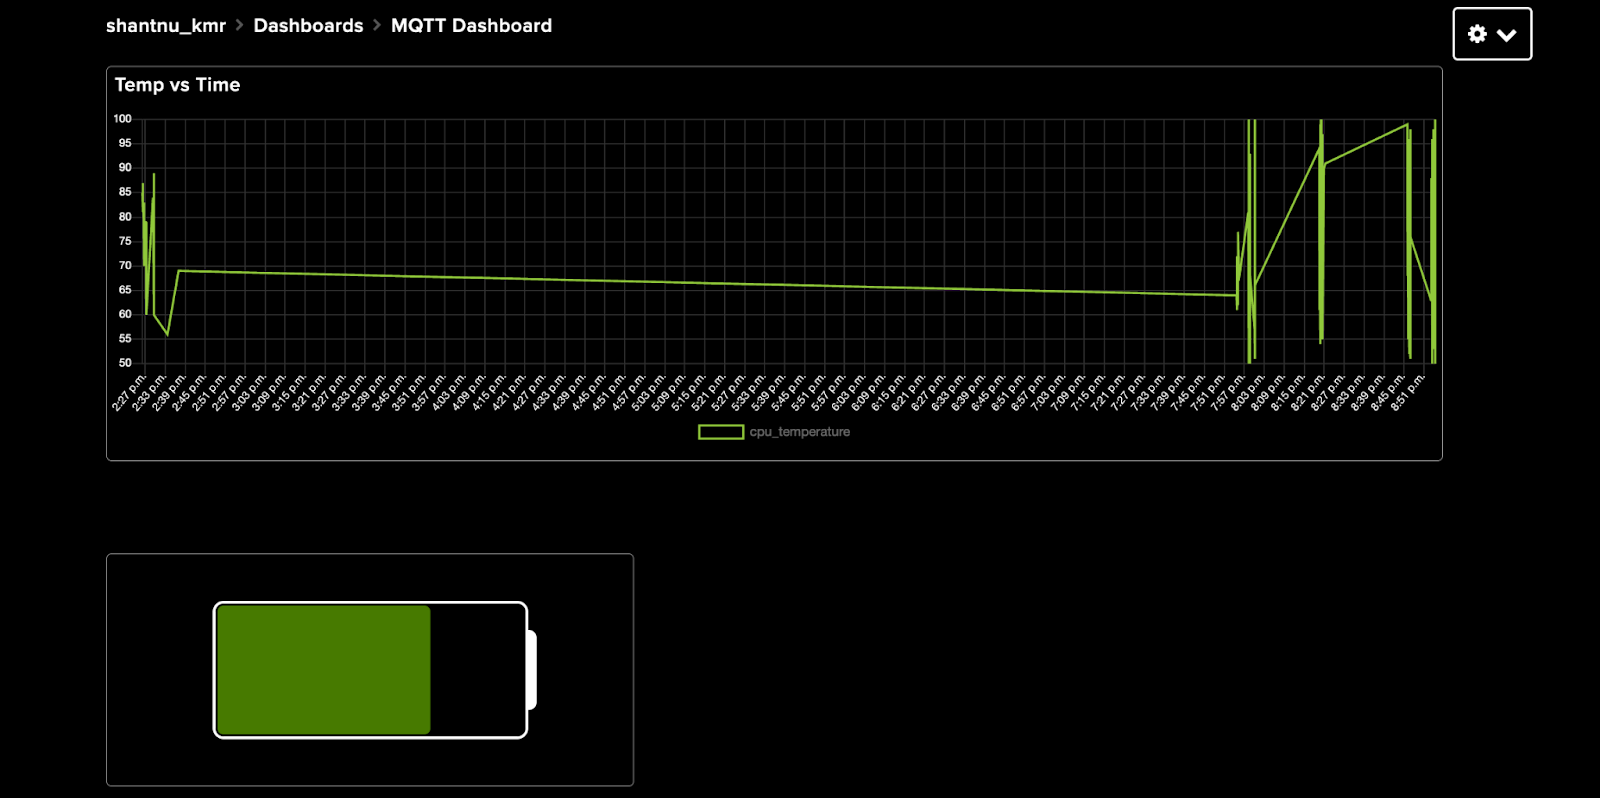
This app will emulate a situation where we send two kinds of data, and Adafruit will map the data on a graph. In the Adafruit dashboard, we have two feeds (topics) to publish the data. (These are not actual battery-percentage and cpu-temperature, but sample data published and mapped to our graph.)
- battery-percentage
- cpu-temperature
Adafruit Dashboard with graph
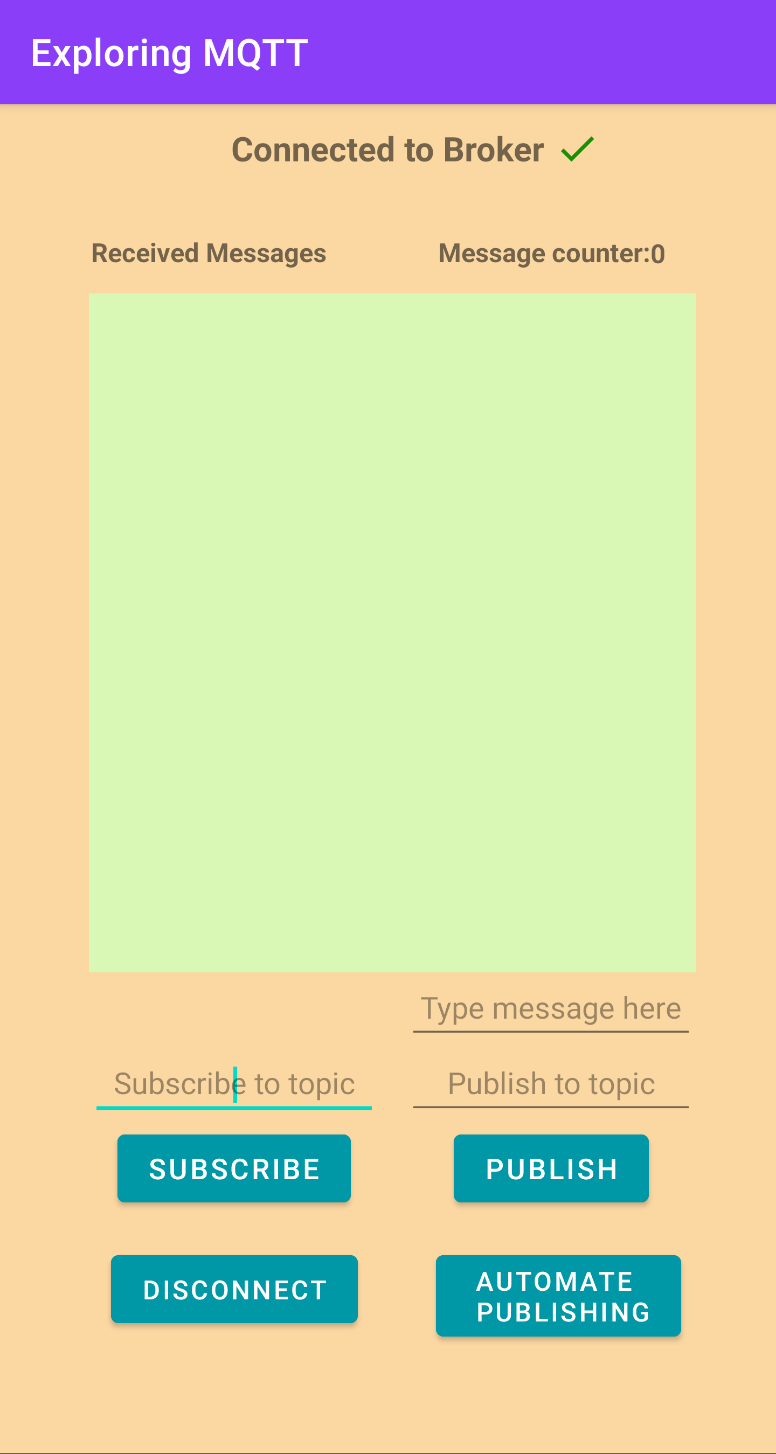
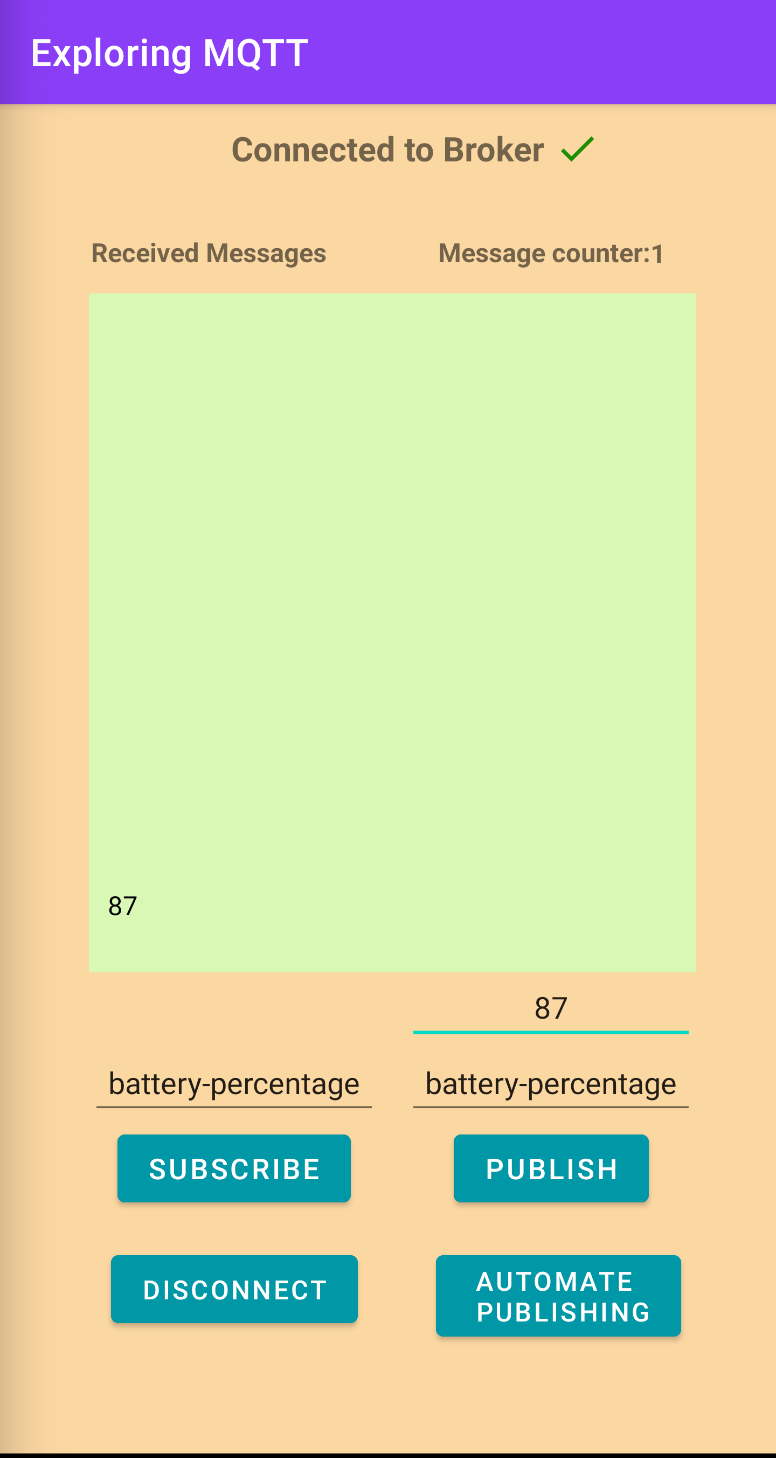
Our sample app lets users publish to a topic, subscribe to a topic, and see messages posted to those topics. Publication to a topic can also be automated. (In MQTT terminology, this means our app is both a publisher and subscriber client.)
Screenshots of the application
App workflow
When our sample app launches, it attempts to connect to the MQTT broker with given credentials and initializes the mqttAndroidClient in the init block of our helper class.
In our example, the serverUri (the ADAFRUIT_MQTT_HOST) is "ssl://io.adafruit.com:8883". The clientId (the unique identifier for each client connected to the broker) is randomly generated based on the current user login name and the system time.
When the mqttAndroidClient is initialized with the above parameters, a callback is set on the mqttAndroidClient to be notified of any client events. For example, if a client connection is lost, a new message arrives, or a delivery is successfully completed.
After the callback is set, we finally call the connect() method.
In the connect function, before we call connect method on the mqttClient, we need to create mqttConnectOptions object. The MqttConnectOptions object specifies the connection parameters that dictate how the client connects to the broker.
- isAutomaticReconnect specifies whether the client will automatically attempt to reconnect to the server if the connection is lost.
- The isCleanSession flag specifies if client and broker should remember state across restarts and reconnects.
- If set to false, message delivery will take place according to the specified QoS even if the connection is reestablished resulting in a durable connection.
- If set to true, message delivery will not take place if the client, broker or the connection is restarted.
- userName and password credentials for the connecting client.
- connectionTimeout specifies the maximum time (in seconds) a client will wait for the network connection to the MQTT server to be established.
- keepAliveInterval defines the maximum time interval (in seconds) between messages sent by a client before the broker will require that client to check in (for example, with a PINGREQ). If the client does not send a message or successfully ping the broker after 150% of the defined interval, the broker will disconnect the client.
Our app then calls IMqttActionListener, which will notify the client whenever a connection succeeds or fails using the two overridden methods onSuccess() and onFailure().
In the onSuccess callback, we set DisconnectedBufferOptions(), which tells our broker to temporarily store messages in the event of a network failure.
Some parameters for DisconnectedBufferOptions include:
- When isBufferEnabled is set to true, the broker will store the message in case of network failure. If set to false, the broker won’t store any messages.
- bufferSize specifies the number of messages the broker can hold before it reaches the full state.
- The isPersistBuffer boolean specifies if buffer will be stored if the broker restarts or connection resets. If set to false, the buffer will be emptied on broker restart or connection reset. If set to true, the messages in the buffer will be retained.
- The isDeleteOldestMessages boolean specifies if old messages should be deleted once the buffer is full. If set to true, the oldest message in the buffer will be deleted once the buffer is fully to make room for new messages. When set to false, an MQTT exception will be thrown once the buffer is full, and no new messages will be retained.
Next, let's define the subscribe method (i.e., when a client subscribes to a topic).
The subscribe method is invoked on the mqttAndroidClient, where we pass the subscriptionTopic and QoS parameters. As in our connect method, we use the IMqttActionListener to determine if a client subscription to a topic succeeds or fails.
When a client wishes to publish a message to a topic, we call the publish method.
Publish passes the topic, message, QoS, and a retained boolean value to mqttAndroidClient. The retained value tells the broker whether the message should be retained (only one message can be retained per topic in the broker). If set to true, the broker will retain the last message published to the topic, and any new subscribers to that topic will receive the retained message upon subscription. If set to false, the last message is not retained, and new subscribers to a topic will only receive messages published after the time of subscription.
And with that, you're all done. Feel free to check the project on my GitHub and play around. And if you'd like to learn more about Esper and how we can help you with your Android device fleet, book a demo today.
Android Developer Tools with Esper
Header image credit: oatawa/Shutterstock.com
FAQ